分布式监控系列:离线部署Centreon 22.10.X -Central端
2023/05/28 17:05 投稿
转载文章请注明源地址:https://www.latiao.org/807.html
本系列暂定共三篇文章:
1.离线部署Centreon 22.10.X -Central端
本测试环境基于 RHEL 8.7 (Server) (UI)
下载离线部署安装包:
链接:https://pan.baidu.com/s/1_BLWDNN3E-SDFn-bHZSD-g
提取码:lt66
第一步:系统配置
vim /etc/sysconfig/network-scripts/ifcfg-ens160
sed -i s/^SELINUX=.*$/SELINUX=disabled/ /etc/selinux/config
systemctl stop firewalld
systemctl disable firewalld
hostnamectl set-hostname a1
setenforce 0
reboot
第二步:安装PHP
rpm -ivh php-common-8.1.17-1.el8.remi.x86_64.rpm oniguruma5php-6.9.8-1.el8.remi.x86_64.rpm httpd-filesystem-2.4.37-51.module+el8.7.0+18026+7b169787.1.noarch.rpm nginx-filesystem-1.14.1-9.module+el8.0.0+4108+af250afe.noarch.rpm php-fpm-8.1.17-1.el8.remi.x86_64.rpm php-mbstring-8.1.17-1.el8.remi.x86_64.rpm php-cli-8.1.17-1.el8.remi.x86_64.rpm php-xml-8.1.17-1.el8.remi.x86_64.rpm第三步:安装central
执行 shell;
wget https://www.latiao.org/wp-content/uploads/2023/04/1681202937-central-install.zip
unzip 1681202937-central-install.zip
chmod a+x central-install.sh
./central-install.sh (在最开始的百度云下载的文件XX/step3下执行)
第四步:设置PHP时区
echo "date.timezone = Asia/Shanghai" >> /etc/php.d/50-centreon.ini
systemctl restart php-fpm
第五步:开机自启
systemctl enable php-fpm httpd centreon cbd centengine gorgoned snmptrapd centreontrapd snmpd crond mariadb第六步:设置数据库
systemctl restart mariadb
mysql_secure_installation
对所有问题回答“是”,但“禁止远程root登录?
必须为数据库的 root 用户设置密码。在 Web 安装过程中,您将需要此密码。
第七步:重启服务器检查开机自启
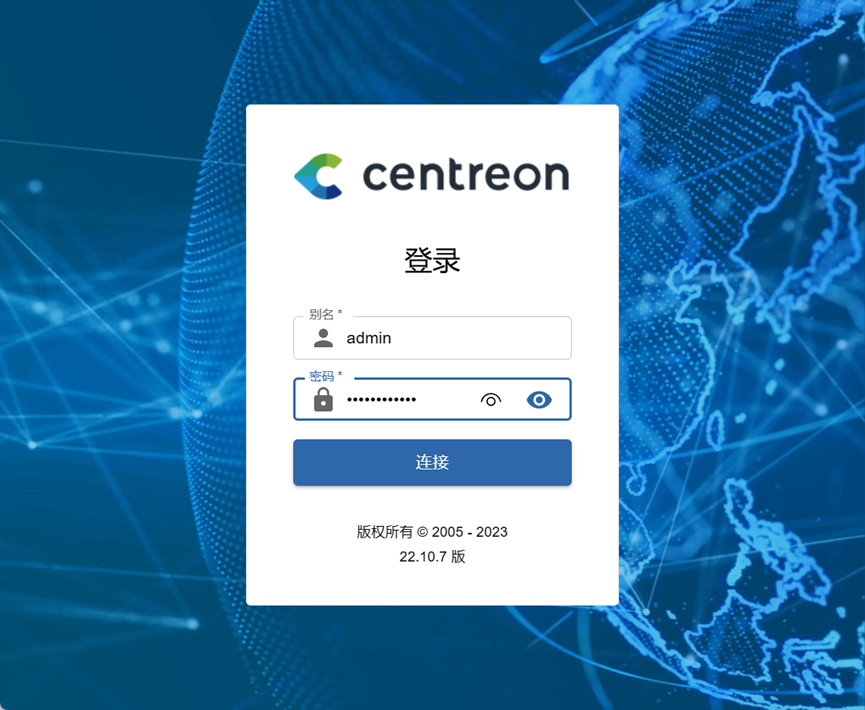
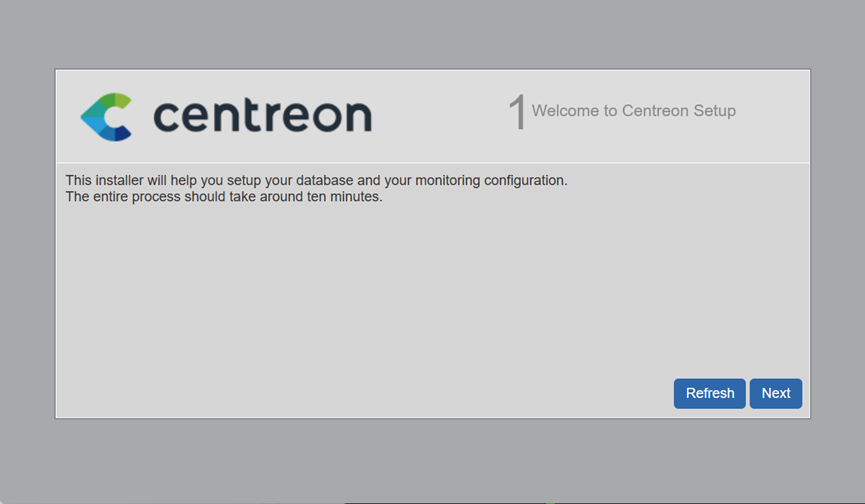
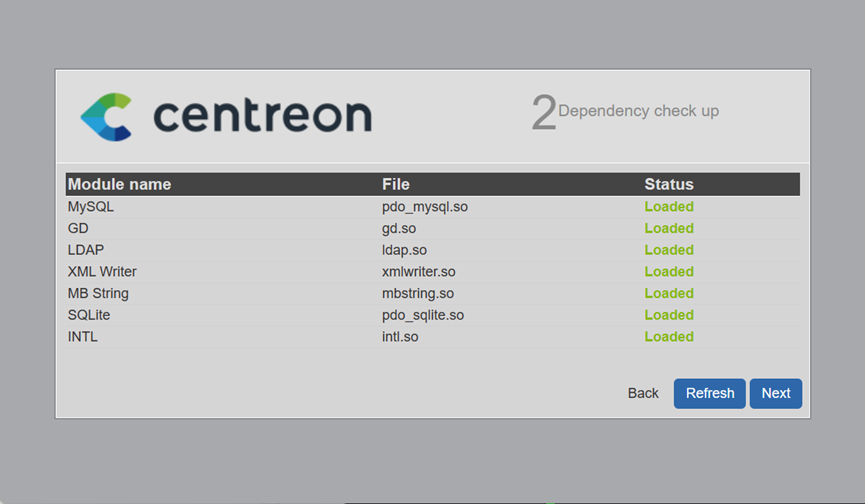
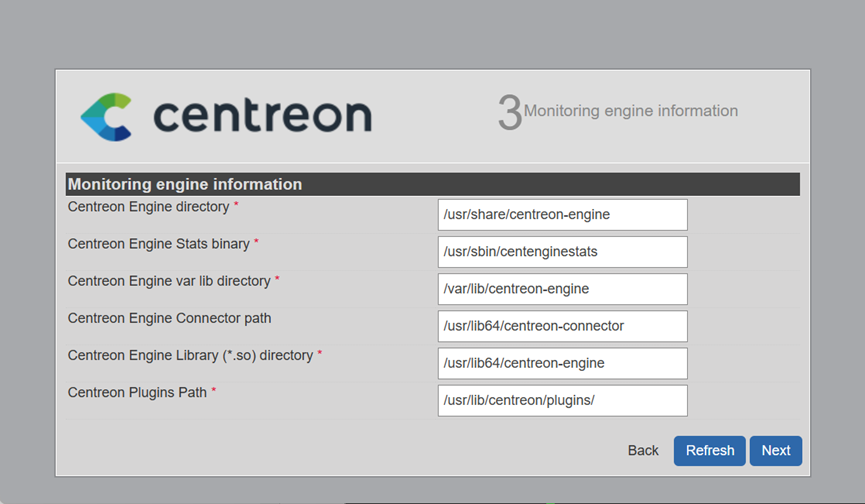
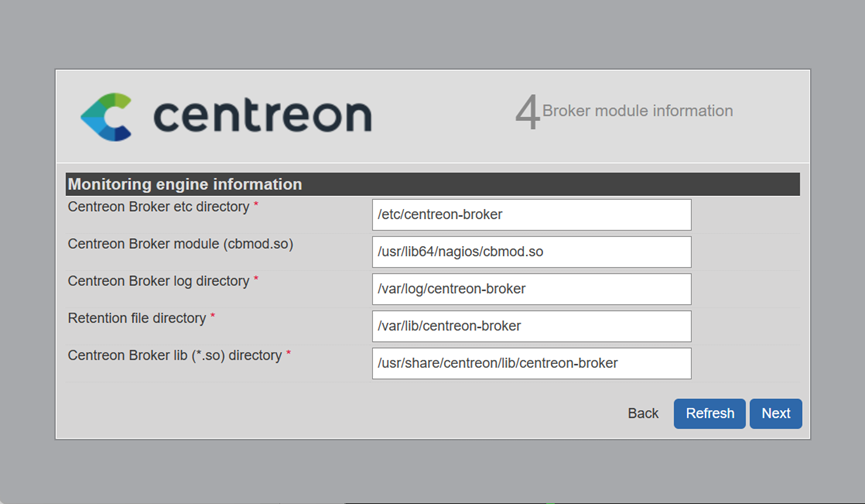
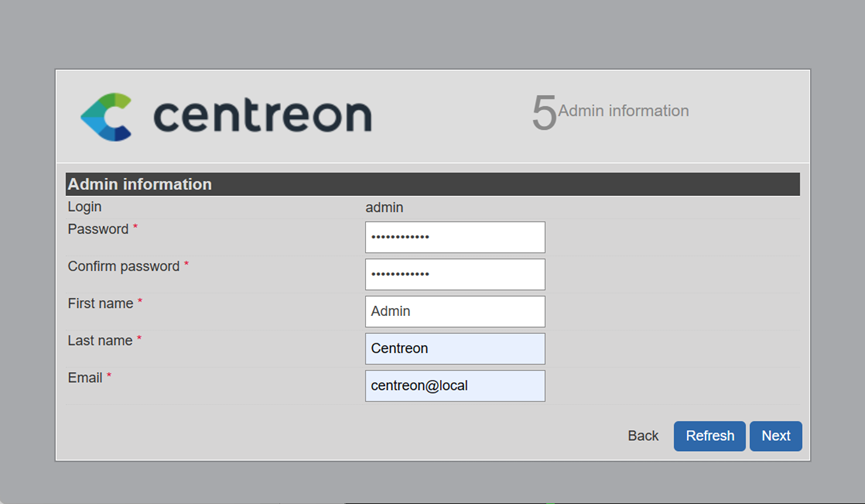
第八步:部署WEB http://IP/centreon/install/install.php
定义监控引擎使用的路径。我们建议使用默认值。
定义代理模块使用的路径。我们建议使用默认值。
定义创建默认管理员帐户所需的信息。
数据库信息
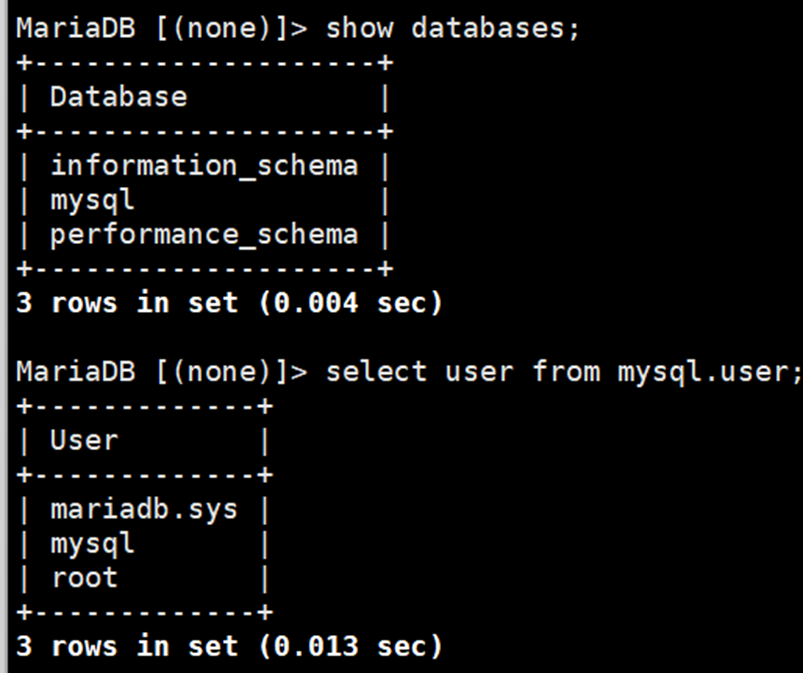
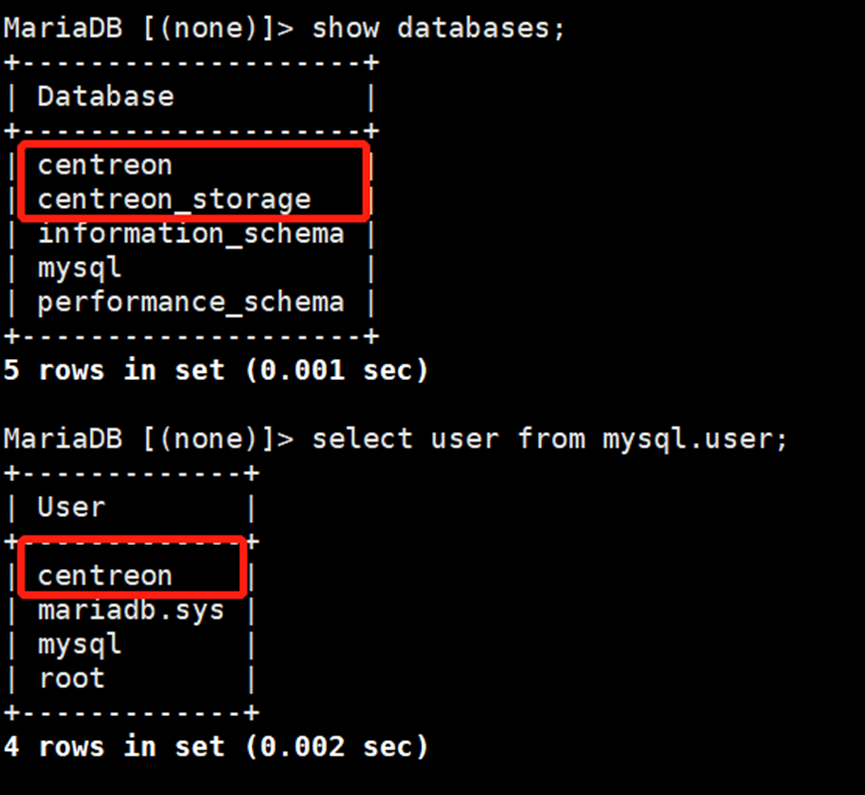
输入root的密码后 会自动去创建专属centreon的库。

创建前
创建后:
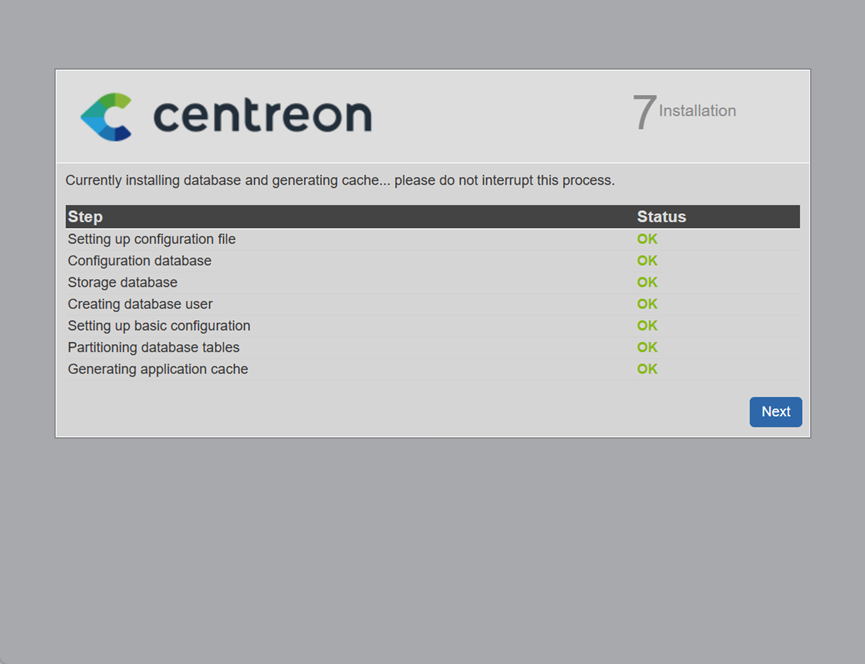
Centreon 安装向导创建配置文件和数据库结构:
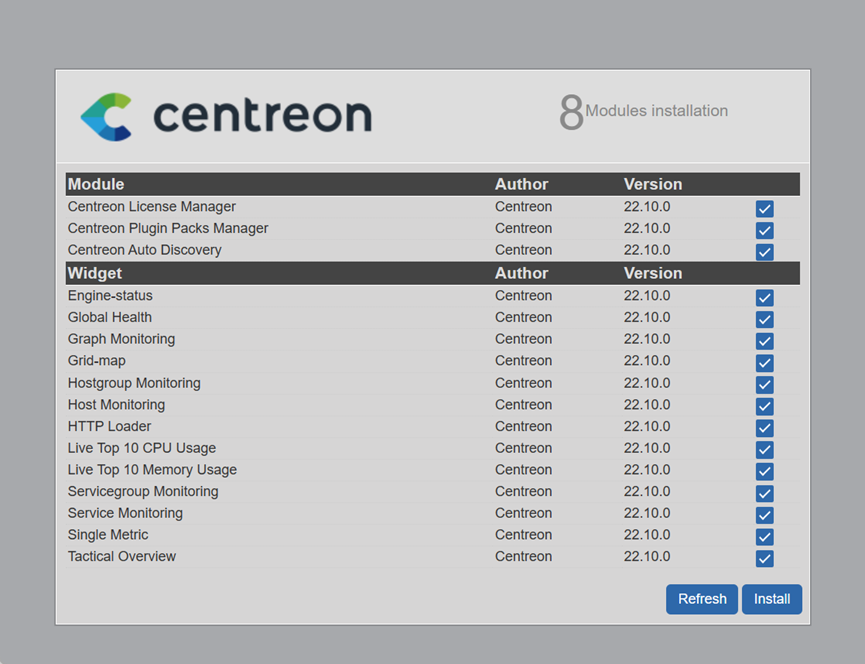
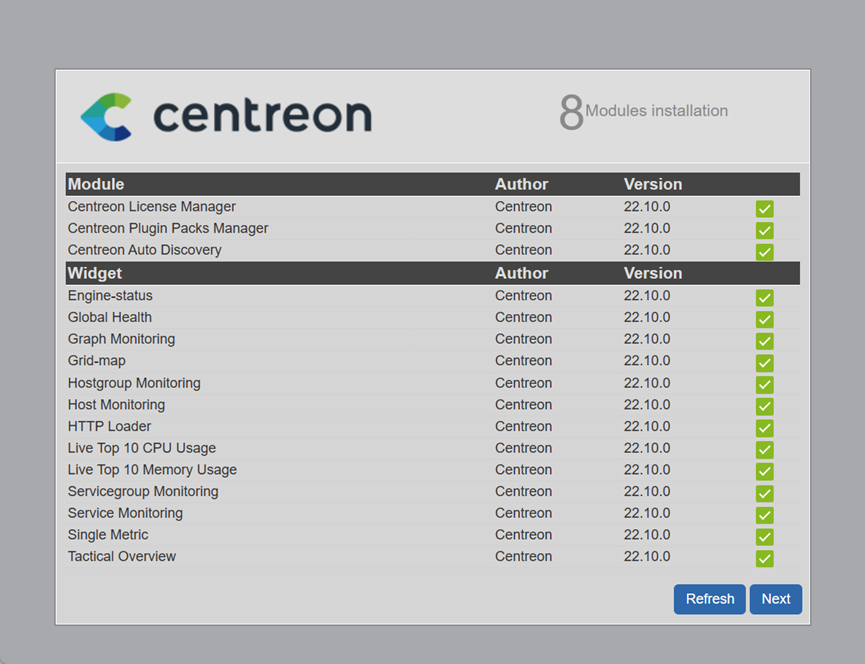
安装一些可选模块:
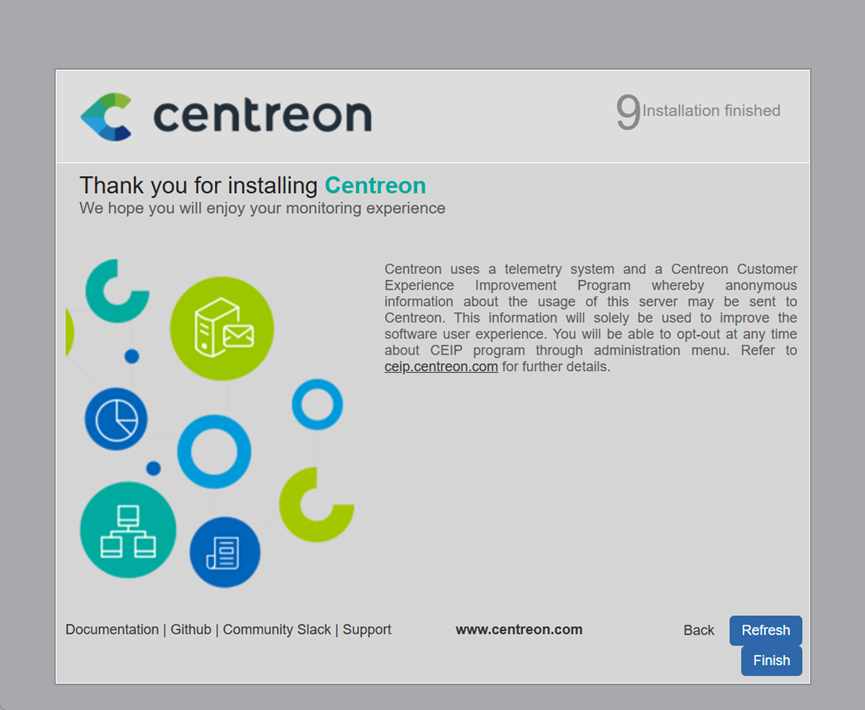
安装完成: